On this page
Name
A campaign needs a name before you can save it.
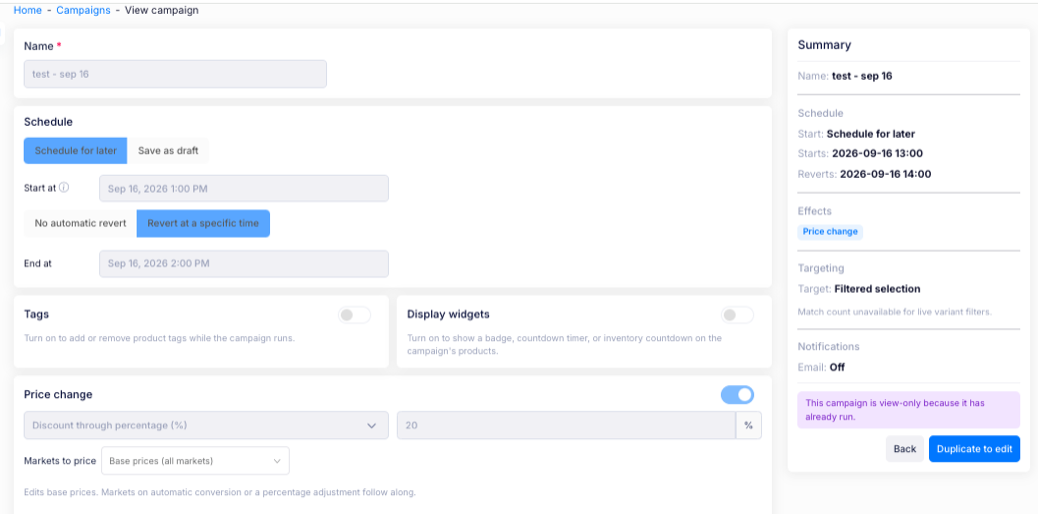
Schedule
Choose how the campaign runs:
- Schedule for later — the campaign starts at the Start at time you set.
- Save as draft — save the campaign without scheduling it, so you can start it yourself later.
- Start at — the date and time the campaign begins.
- No automatic revert — prices stay at the campaign price when the campaign ends.
- Revert at a specific time — prices return to normal at the End at time you set.
Tags
Turn on Tags to add or remove product tags while the campaign runs.
Display widgets
Turn on Display widgets to show a badge, countdown timer or inventory countdown on the campaign's products.
Price change
Turn on Price change to discount the campaign's products.
- Discount type — choose how to apply the discount, then enter the value:
- Discount through percentage (%)
- Discount by cutting price (amount)
- Discount by offering a new price
- Markets to price — choose which markets the change applies to.
Note: Base prices (all markets) edits base prices; markets on automatic conversion or a percentage adjustment follow along.
Choose the options that apply:
- Keep in sync — products are discounted while they match your filter, and returned to normal when they no longer match.
- Round to attractive price endings — round discounted prices to a consistent ending, for example .99.
- Prevent stacking discounts — always on for campaigns; variants that are already discounted are skipped.
- Ignore variants sold at a loss — skip variants where the cost is greater than the new price.
- Use live compare-at on revert — when reverting, restore the price from the current Shopify compare-at value, so base-price edits made during the campaign are preserved.
Notifications
Turn on Email notification to get an email when the campaign becomes active, and again after its final revert.
Targeting
Choose which products the campaign applies to:
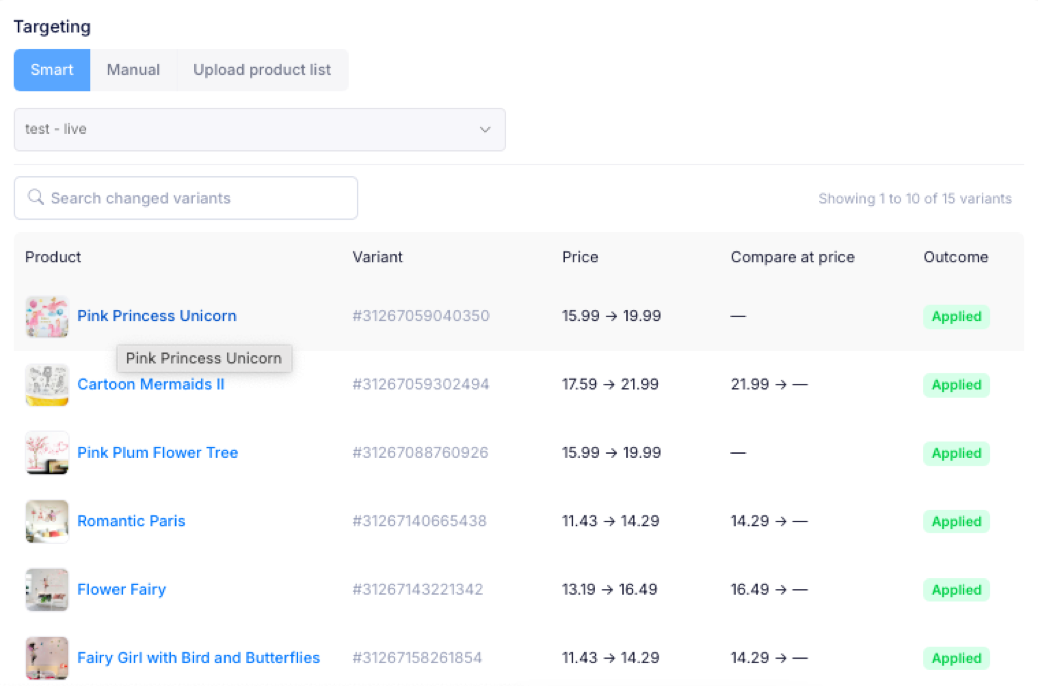
- Smart — choose live or smart filter as required.
- Manual — choose the products yourself.
- Upload product list — upload a list of products.
Smart
Choose your filter from the Select a product or variant target filter dropdown.
The filters are grouped so you can find one quickly:
- Live filters — filters that read product data live.
- Background filters — filters that run against synced data.
Manual
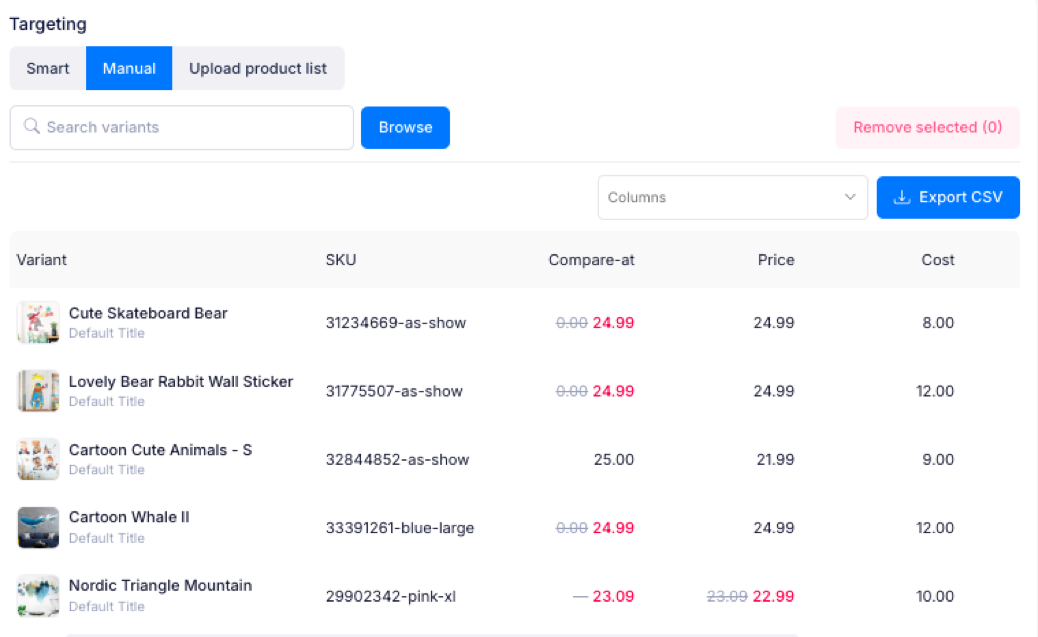
Choose Manual to select the variants yourself.
- Search for a variant, or select Browse to add variants.
- Select variants and choose Remove selected to take them out.
- Use Columns to choose which columns the list shows, and Export CSV to download the list.
Each variant shows its SKU, Compare-at price, Price and Cost.
Upload product list
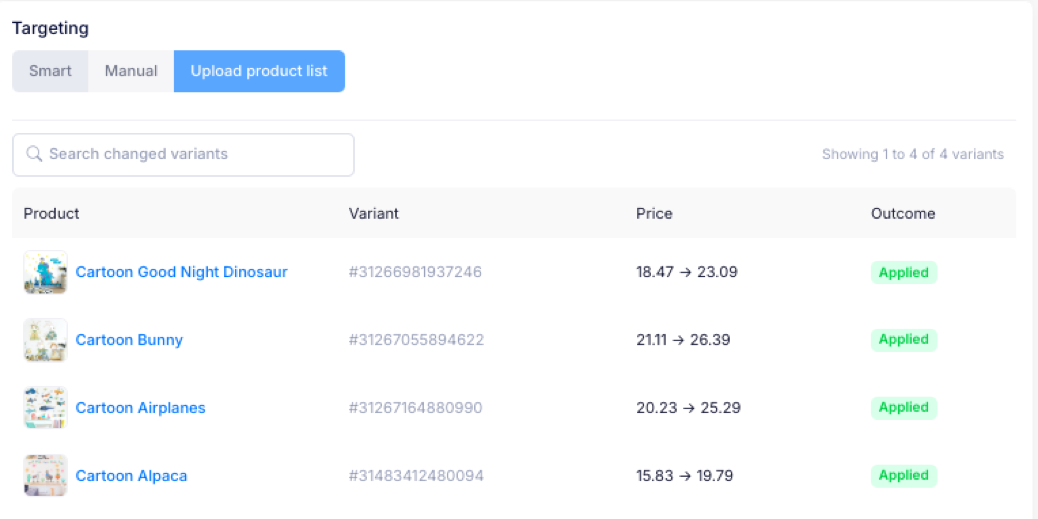
Choose Upload product list to target the products or variants from a list you upload.
Summary
The summary panel shows the campaign as you set it up: its name, schedule (start and revert times), effects, targeting and notifications.
If you have additional questions, contact us using the chat button in the corner or email us at help@ouiteo.com.